Create a Status Page
What you’ll learn
Section titled “What you’ll learn”In this tutorial, you’ll create a public status page to communicate your service’s health to users. A status page is a transparent way to show real-time uptime information and keep your users informed during incidents.
Prerequisites
Section titled “Prerequisites”- An openstatus account
- At least one monitor created (see Create Your First Monitor)
What you’ll build
Section titled “What you’ll build”By the end of this tutorial, you’ll have:
- A public status page showing your service health
- Monitors displayed on your status page
- Understanding of privacy and security options
This tutorial will guide you through the process of creating a status page in openstatus. A status page is a web page that displays the status of your services, building trust with your users through transparency.
Get started
Section titled “Get started”1. Create the status page
Section titled “1. Create the status page”Navigate to the Status Pages page from the sidebar and click the Create Status Page button. This will open a new configuration screen.

2. Configure the status page
Section titled “2. Configure the status page”After creating the status page, you can configure it
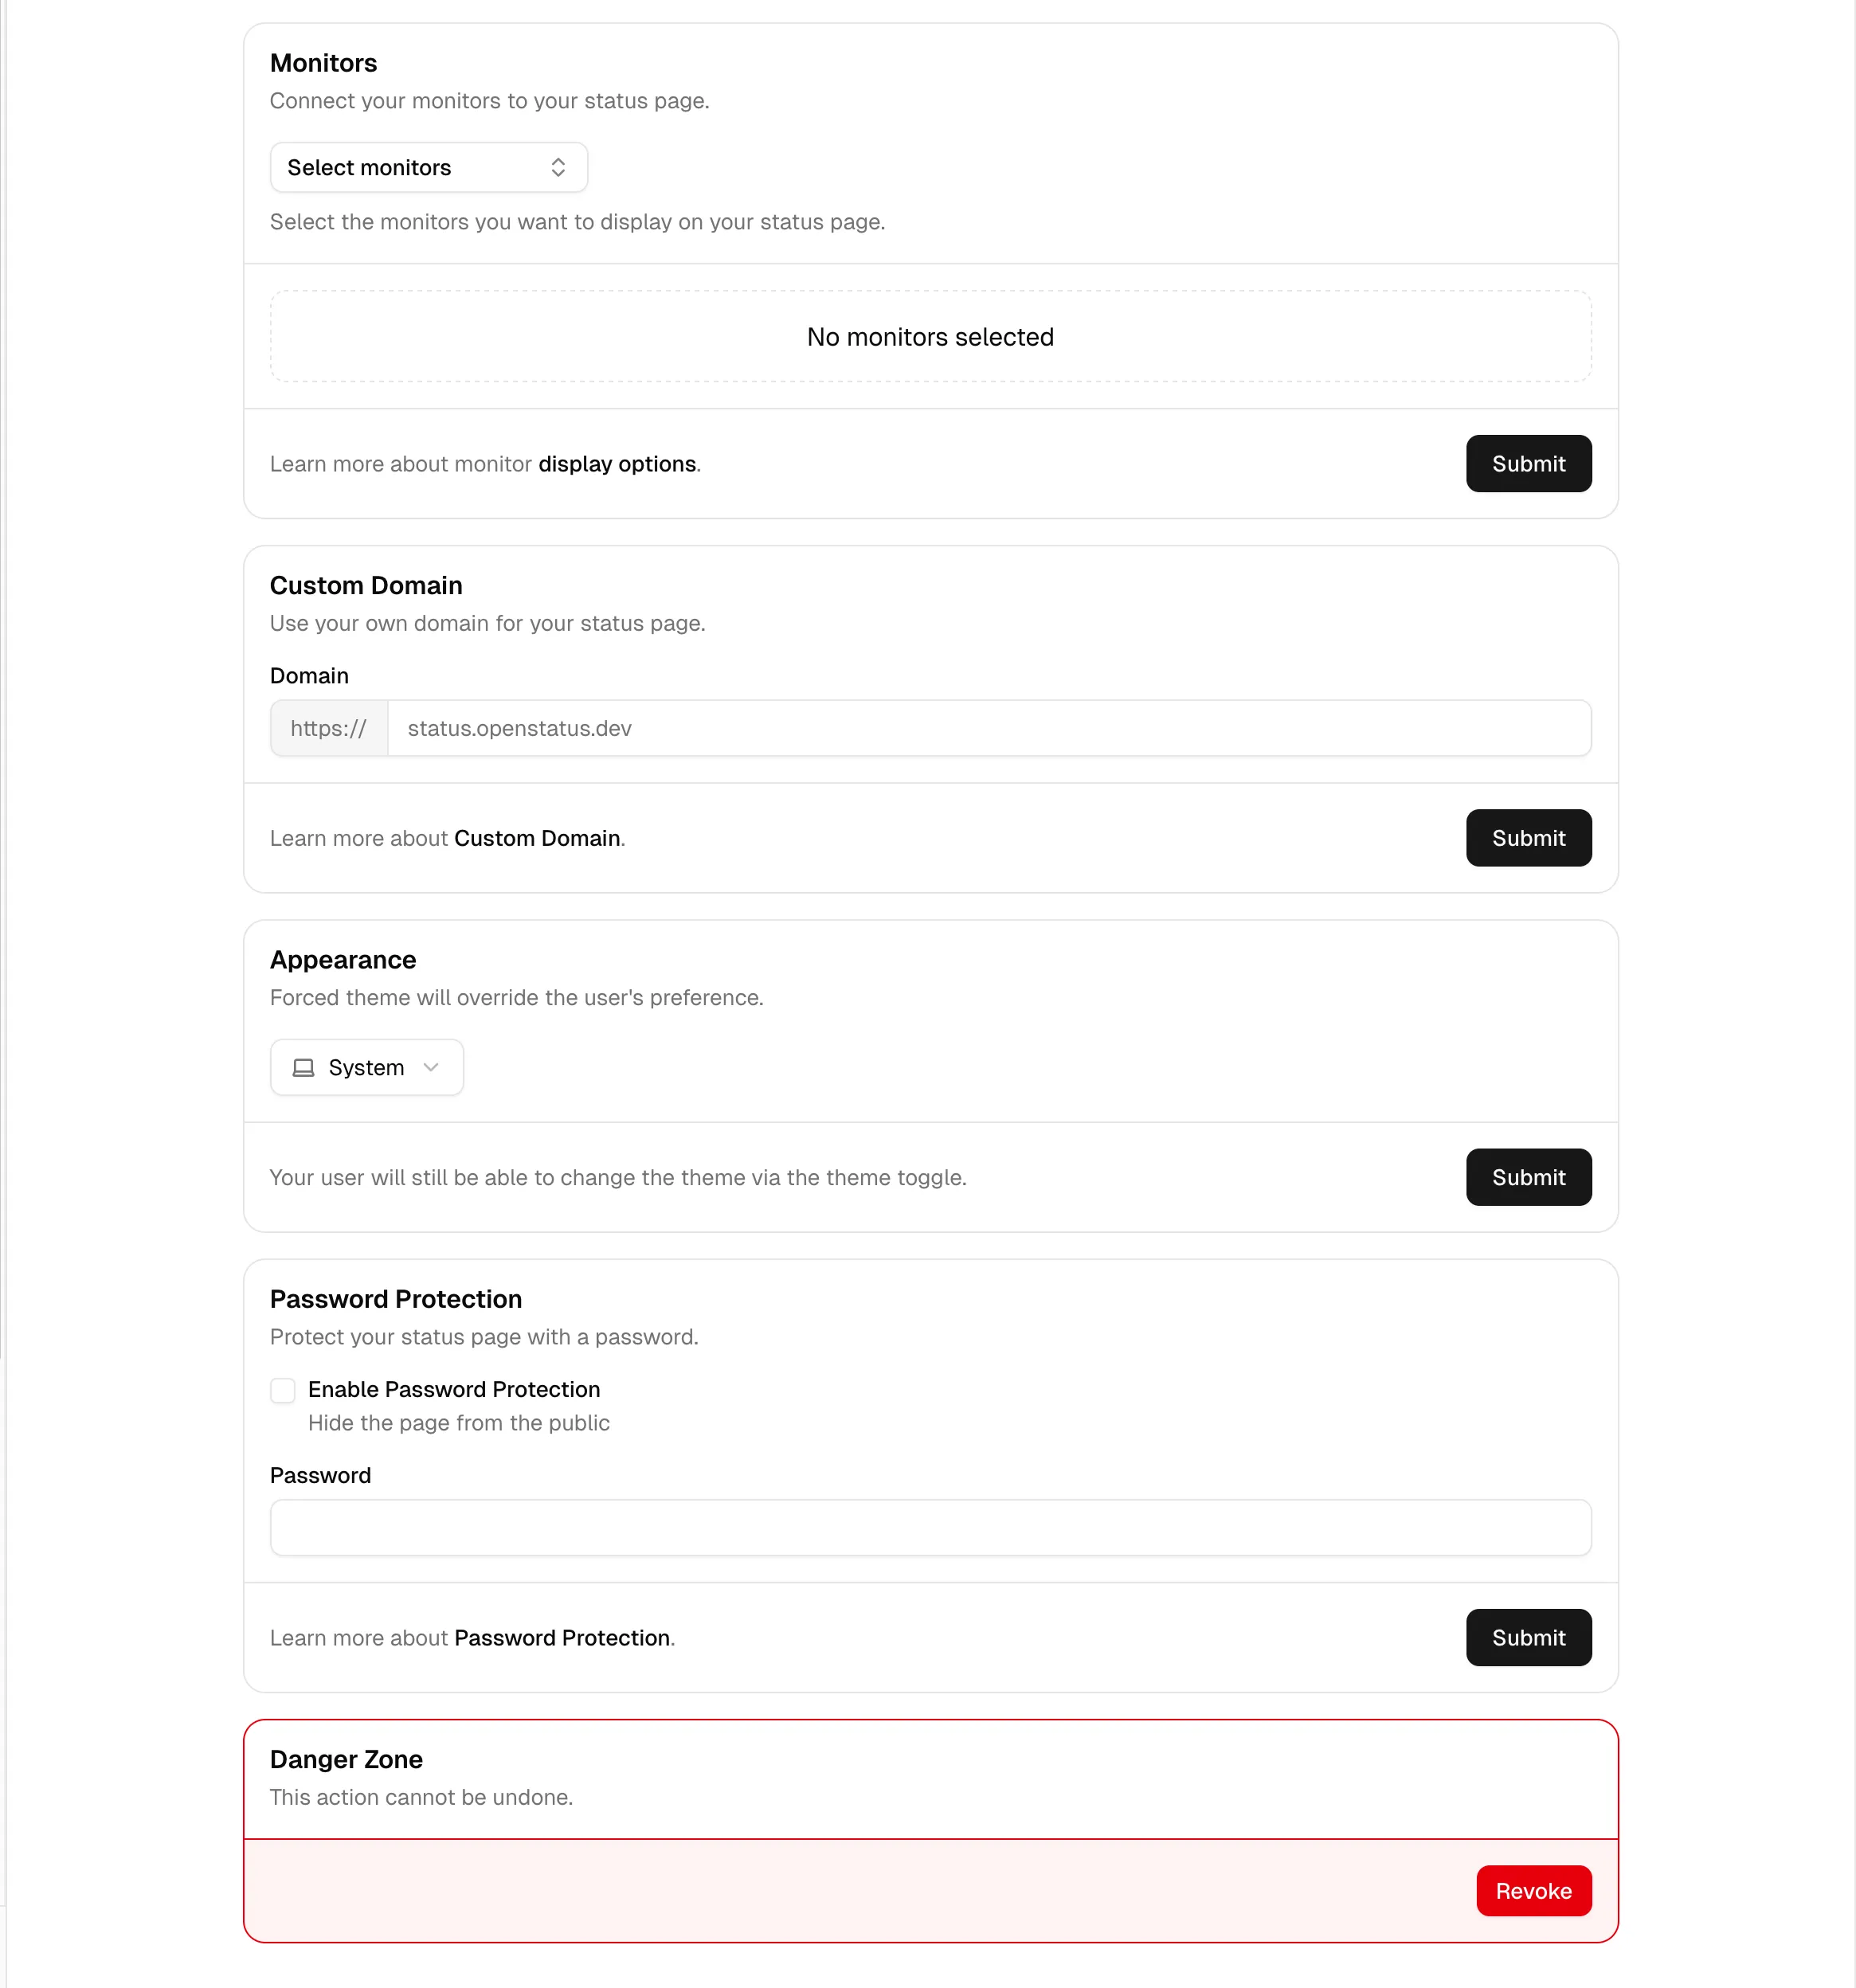
Monitors
Section titled “Monitors”You need to add monitors to your status page. Monitors are used to check the status of your services.
Custom domain
Section titled “Custom domain”You can add a Custom Domain to your status page. Custom domains allow you to use your own domain name instead of the default domain name provided by openstatus.
Password Protection
Section titled “Password Protection”You can add password protection to your status page. Password protection allows you to restrict access to your status page to only authorized users.
What you’ve accomplished
Section titled “What you’ve accomplished”Great work! You’ve successfully:
- ✅ Created your first status page
- ✅ Added monitors to display service health
- ✅ Learned about custom domains and password protection
What’s next?
Section titled “What’s next?”Now that you have a basic status page, you can:
- Configure Your Status Page - Customize appearance and add more features
- Configure Notifications - Alert your team when issues occur
- Building Trust with Status Pages - Learn how to communicate effectively
Learn more
Section titled “Learn more”- Status Page Reference - Complete configuration options
- Understanding Uptime Values - How uptime is calculated
- Status Page Examples - See status pages from other users